Create Form | Auto Responder | Edit Form | Delete Form | View Form Responses
Forms are a useful way of getting information from visitors to your site.
Forms are created in Global Office in a similar way to the normal web pages. The forms are stored in folders and use the Web Editor to create the text.
A form is made up of fields which allow a user to enter information, the picture below gives an example of a form.
This form below has 5 different fields that the user can complete. Two of the fields (Name and Email) are Required Fields, which means that the user will have to enter that information before they can submit the form.
You can have up to 30 different fields in a form and you will be able to choose whether you want to make any of your fields compulsory.
Different types of field
There are 5 different types of field available for your forms – some are just text fields and some allow you to enter a number of different answers for the user to select. An example of this is in the above form where the last question has a Yes or No answer. When completing the above form, the user would need to select either yes or no.
Text Field
 A text field will allow the user to enter a line of text. This is great for requesting small bits of information such as names, email addresses and phone numbers.
Multiline
 This is similar to a text field but it allows a lot more information to be entered such as addresses.
List
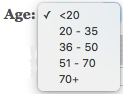 This will allow the user to select one of the different options. The answers available will be set when the form is created in the Control Panel. For example if you created a field that asked a question, such as age, the form could have the following values
<20, 21 – 35, 36 – 50, 51 – 70, 70+. When completing the form, the user would select which option was the appropriate answer for them.
Radio Buttons
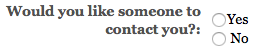 This is similar to the list button, only the answer will be displayed in a different format. Only one option can be selected.
Tickbox
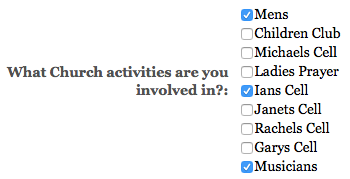 As with the radio button and the list fields, the user will be able to select from the different options available. However, the tickbox allows the user to select more than 1 of the answers available. They will be able to select any number of options available to them.
Creating a new form
Site Managers will be able to create forms in the same way as creating pages, by going to Web Pages in Global Office and selecting the appropriate folder for the form.
Once you have chosen the folder to place the form in, press the New Form button 
The Following form will then be displayed.
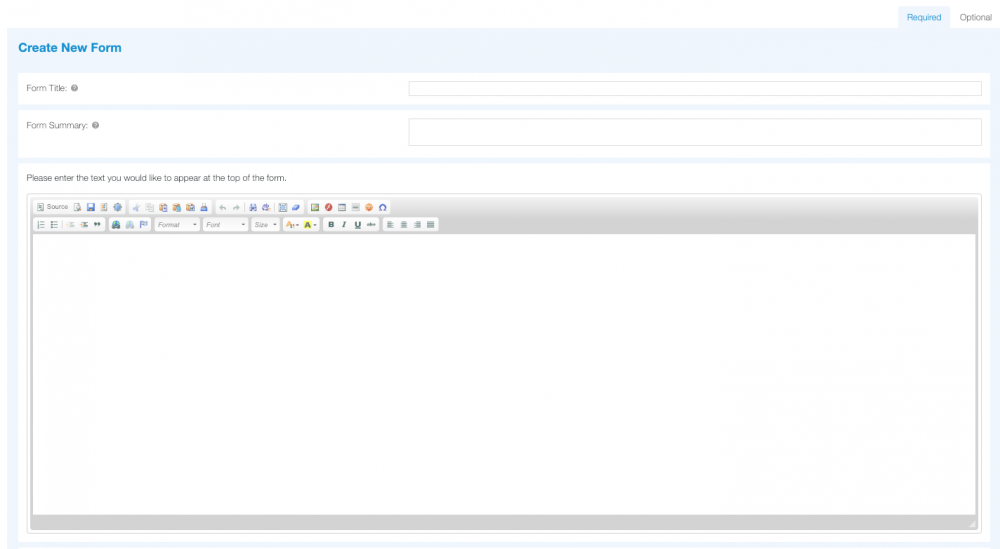
The Form Summary is a brief one sentence description of the form, this is optional. The Form Introduction will be displayed at the top of the page. Again this is optional, but the Web Editor is used if you want to enter information on the introduction.

If you would like to receive an email copy of completed forms, then you can enter an email address in the Email field. This will mean that as soon as someone completes a form, the details entered will be emailed to the nominated email address. You are able to add more than one email address, if you wish. The email addresses will need to be separated with commas and a copy of the form will be sent to each email address you have added. A copy of the completed form will also be stored on the website and you will be able to access this from Global Office.
You can also select the type of field for the first field by using the New Field drop down menu. An example of each field will be shown when you change the drop down menu.

You can also add some response text that will show on your website for anybody who submits the form.
There is the option to add an auto response email, which will be sent to the person completing the form, when it is submitted. If you wish to use the auto responder, you will need to switch the option on and enter the text for the email.
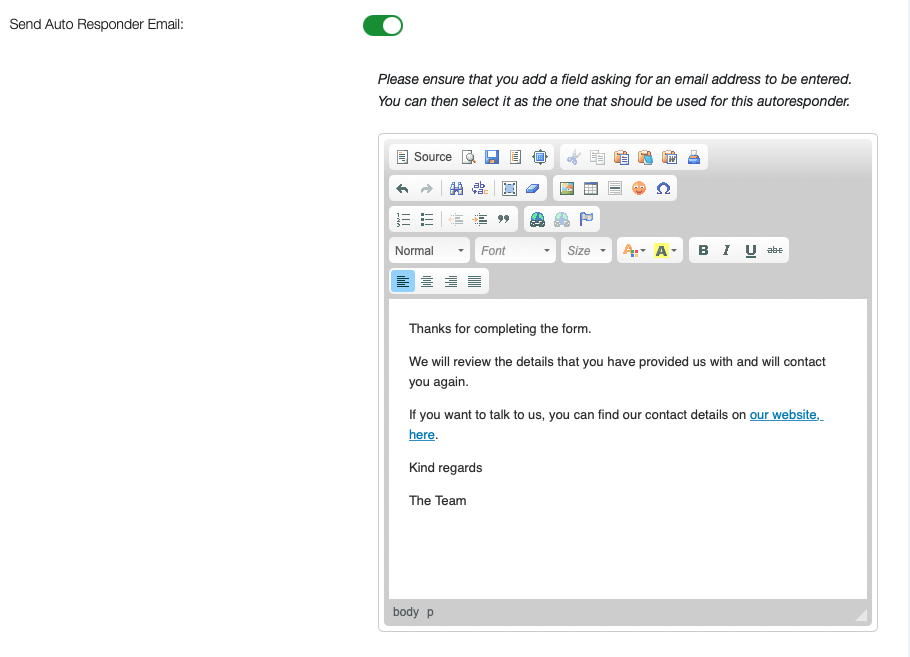
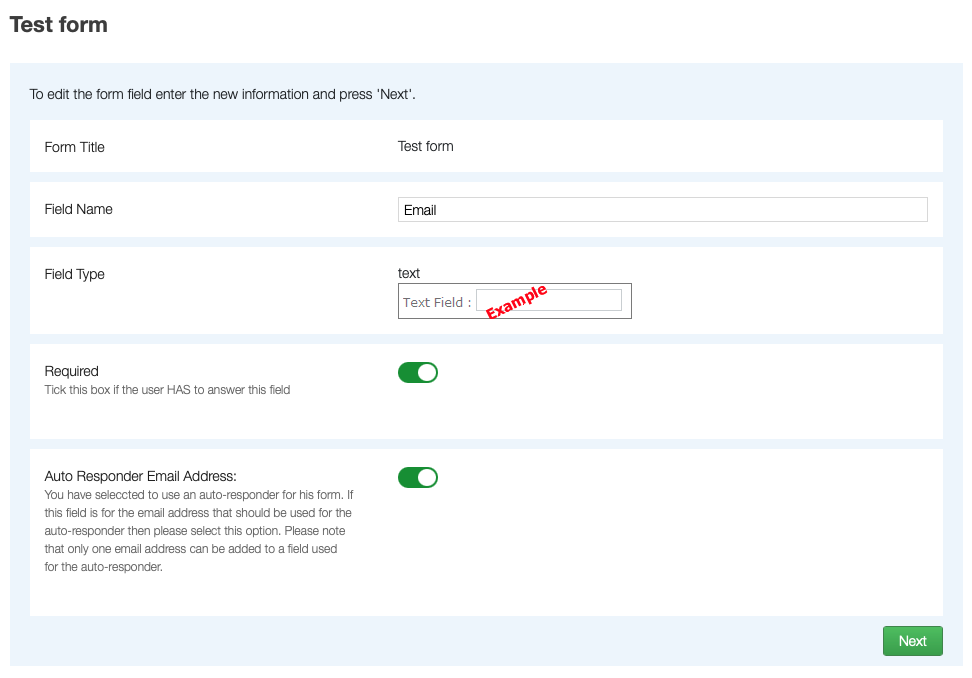
If you choose to use the Auto Responder, you will need to make sure you add a field that asks for an email address, and you will need to switch on the Auto Responder Email Address option.
Once you have entered all the details and chosen the type of field you require for your first field, click the Next button.
The following page will then be displayed for you to enter the details of each field. You will need to enter the Field Name, this will tell the user what data they will need to enter when completing the form. For example, if you require them to enter their name you could just put 'Name', if you were asking a question then put the question here, such as ‘How long have you been living in town?’.
If you want the user to have to enter a answer for this field then tick the Required box. This will ensure that the user cannot submit their form until they answer this question.
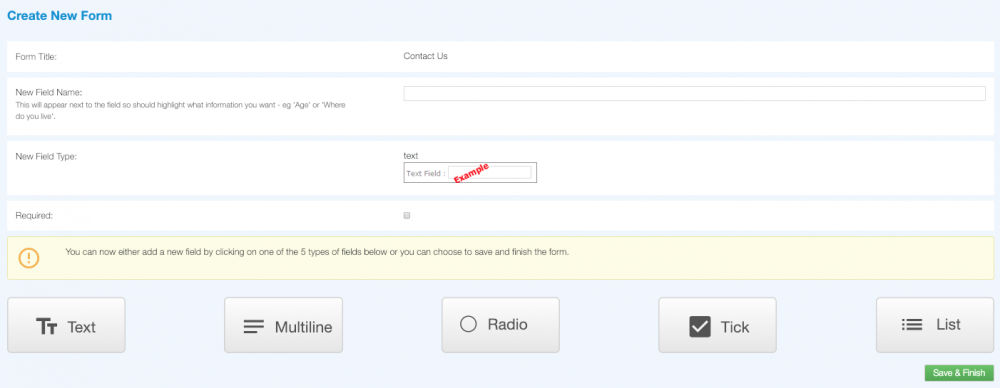
Once you have entered the details for this field, you must either add another field or finish the form.
If you choose to add another field then you must select what type of field this will be by clicking one of the options at the bottom of the page. An identical page will be shown for every new field you create.
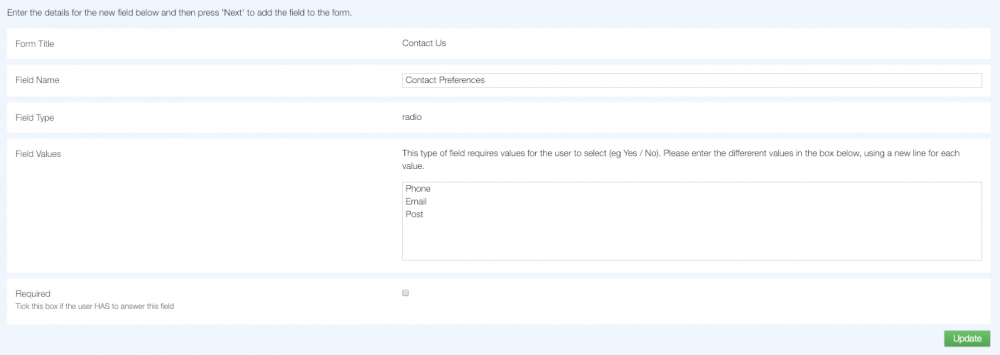
If you have selected to add either a radio, tickbox or list then you will need to enter Field Values. The Field Values define the different answers that the user can choose from when completing the form. They could be just Yes or No, or could be a range of different values. You can add as many as you like, each option should be placed on a new line as in the example below.
Once you have created all of your fields, click the Save & Finish button and your form will be live on your website.
Editing a form
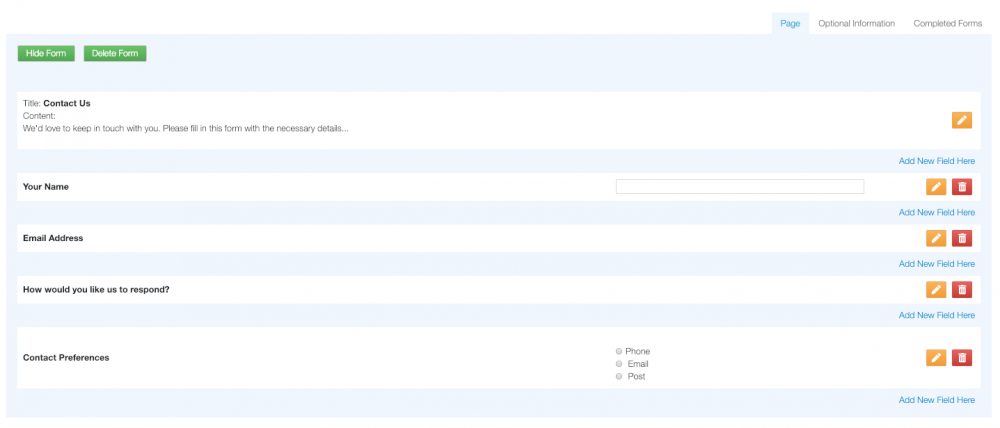
You can edit the form by selecting it from the folder menu in Global Office. Go to Web Pages, click the folder that contains the form and click the pencil icon. The form will then be displayed in a format similar to the following screen shot.
-
If you want to edit the title, summary, introduction text of the page or the email address that notifications are sent to, then you should click the first edit button.
-
To edit or delete individual fields press the edit or delete button next to that field.
-
You can insert a new field anywhere by clicking on the Add New Field Here button.
-
To change the email address that form notifications are sent to, click the pencil icon in the top section of the form. You will find the email address below the first editor window.
Deleting a form
Forms are deleted in the same way as pages. In Global Office, go to Web Pages, click the folder that contains the form and press the delete button  next to the form. You will be asked to confirm the deletion and once done, this will permanently destroy the form and all the form responses.
Note
This cannot be undone.
Viewing form responses
Every time a visitor fills in a form on your site, a form response is created. These are stored in Global Office allowing Site Managers the facility to view all the responses.
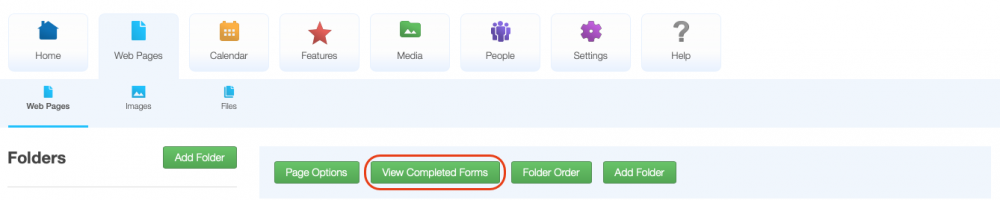
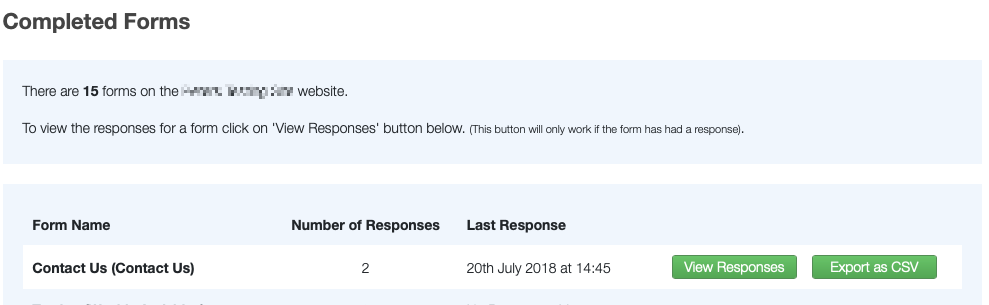
You are able to view a list of all your forms, and then view the responses, by clicking Web Pages and clicking the View Completed Forms button.
You can then click the View Responses button next to the relevant form. You also have the option to Export as CSV from this page.
Form responses, for a specific form, can be located in Global Office by clicking Web Pages and then selecting the folder that contains the form. Click the pencil icon to edit the form and simply click Completed Forms to see the completed responses.

Clicking this button will then show all the responses for that form, you can then delete or print the responses.